But if you find that Windows 7 is opening the wrong program when you insert an audio CD, you might wish to fix that. Our tutorial below will show you where to find the Autoplay menu in Windows 7 so that you can customize the behavior as you see fit.
How to Choose the Autoplay Setting for Audio CDs in Windows 7
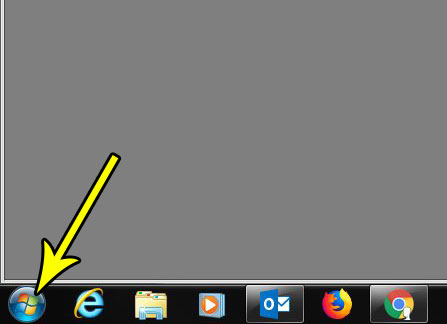
The steps in this article are going to show you how to change the Autoplay setting for audio CDs. This will control what your computer does when you insert an audio CD into the CD or DVD drive on your computer. There are a number of different actions and programs that you can choose from, so you should be able to achieve the desired effect. Step 1: Click the Start button at the bottom-left corner of the screen.
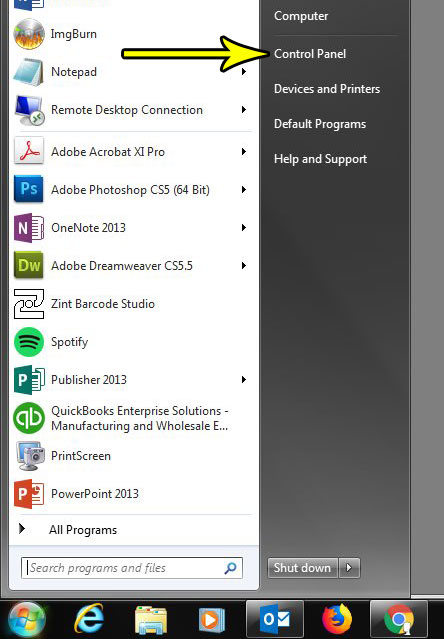
Step 2: Choose the Control Panel option in the right column of this menu.
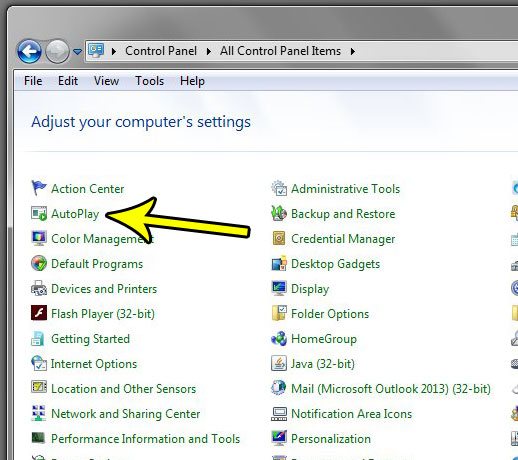
Step 3: Click the View by dropdown menu at the top-right of this window, then choose the Small icons option.
Step 4: Click the Autoplay button.
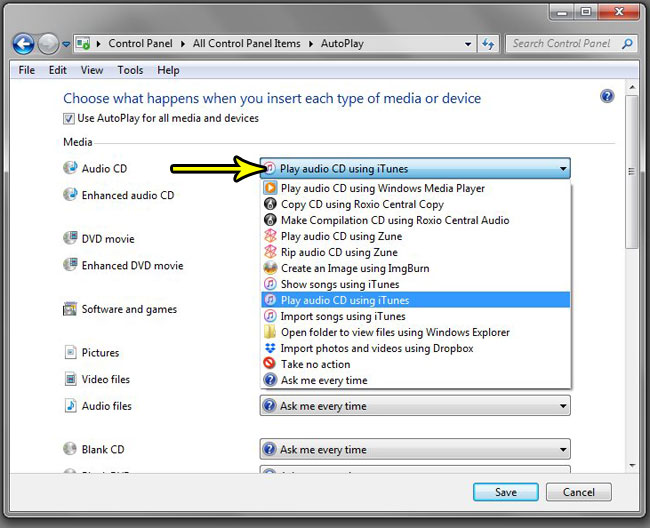
Step 5: Click the dropdown menu to the right of Audio CD, then select the preferred action.
Step 6: Click the Save button at the bottom of the window to save and apply the change. Note that you can also get to the Autoplay menu by clicking the Start button, typing “Autoplay” into the search field, then clicking the Autoplay search result. Would you like to make it easier to identify your files by including the file extensions when you view them in Windows Explorer? Find out how to display file extensions in Windows 7 if your computing experience would be improved by the addition of that information. He specializes in writing content about iPhones, Android devices, Microsoft Office, and many other popular applications and devices. Read his full bio here.


