How to Make a Blurred Background in Your Picture With Photoshop CS5
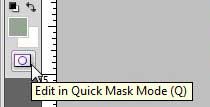
Begin by opening the image for which you want to learn how to blur out the background. You can either launch Photoshop CS5 and use the Open command on the File menu, or you can right-click the file, click Open With, then click Adobe Photoshop CS5. At the right side of your Photoshop window is a Layers panel that displays each of the layers that are currently in your Photoshop image. If the panel is not there, you can press F7 on your keyboard to open it. If you are working with a regular image file, such as a JPEG, GIF or PNG, then there will only be one layer. However, if you are working with a PSD, PDF or other file type that is capable of storing layer information, then there could be several layers there. Regardless of the file type, click the layer that contains the background you want to blur. Click the Edit in Quick Mask Mode button at the bottom of the toolbar at the left side of the window. If you are having trouble locating this tool, look for the icon in the image below.
Click the Brush tool in the toolbar, then select a brush size that is large enough to efficiently draw over the foreground object that you do not want to blur. In the image below, I am drawing over the middle penguin, because I want him to be the part of my image that is not blurred. To do some more precise work with the brush tool, I recommend decreasing the size of the brush, then zooming in on the image to get the more precise areas, such as the edges of the object.
When you are done, then entire foreground object should be painted in a transparent red color.
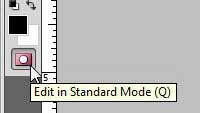
Click the Edit in Standard Mode button at the bottom of the toolbar to go back to the regular editing mode. This is the same button that you clicked earlier, but the name of it is changed now.
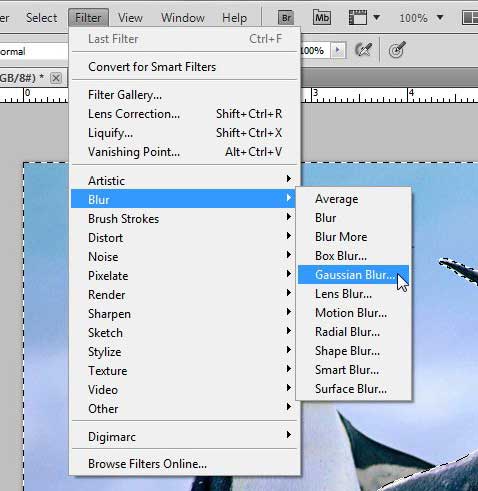
Your entire background area should now show the blinking black and white lines that indicate that an area is selected. Click the Filter menu at the top of the window, click Blur, then click Gaussian Blur.
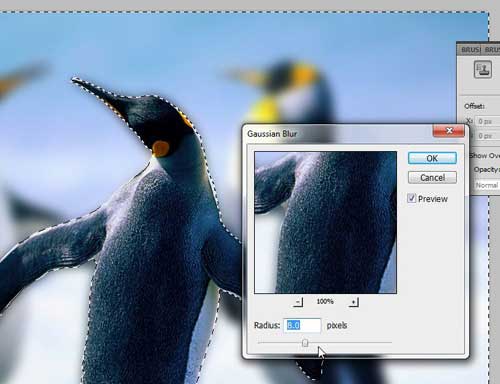
Drag the slider at the bottom of the window until you see the desired amount of blur in the image. The higher the number in the Radius field, the blurrier your background will be.
When you are happy with the blur effect displayed in your image, click the OK button to apply the blur to the image.
Be sure to save the image with a different file name if you want to keep a copy of the unaltered, original file. Once you are comfortable using the Quick Mask tool and the Gaussian blur, you can also consider applying other blur types to your Photoshop images. They can produce similar effects that you might prefer to the one created with the Gaussian blur. After receiving his Bachelor’s and Master’s degrees in Computer Science he spent several years working in IT management for small businesses. However, he now works full time writing content online and creating websites. His main writing topics include iPhones, Microsoft Office, Google Apps, Android, and Photoshop, but he has also written about many other tech topics as well. Read his full bio here.
You may opt out at any time. Read our Privacy Policy


